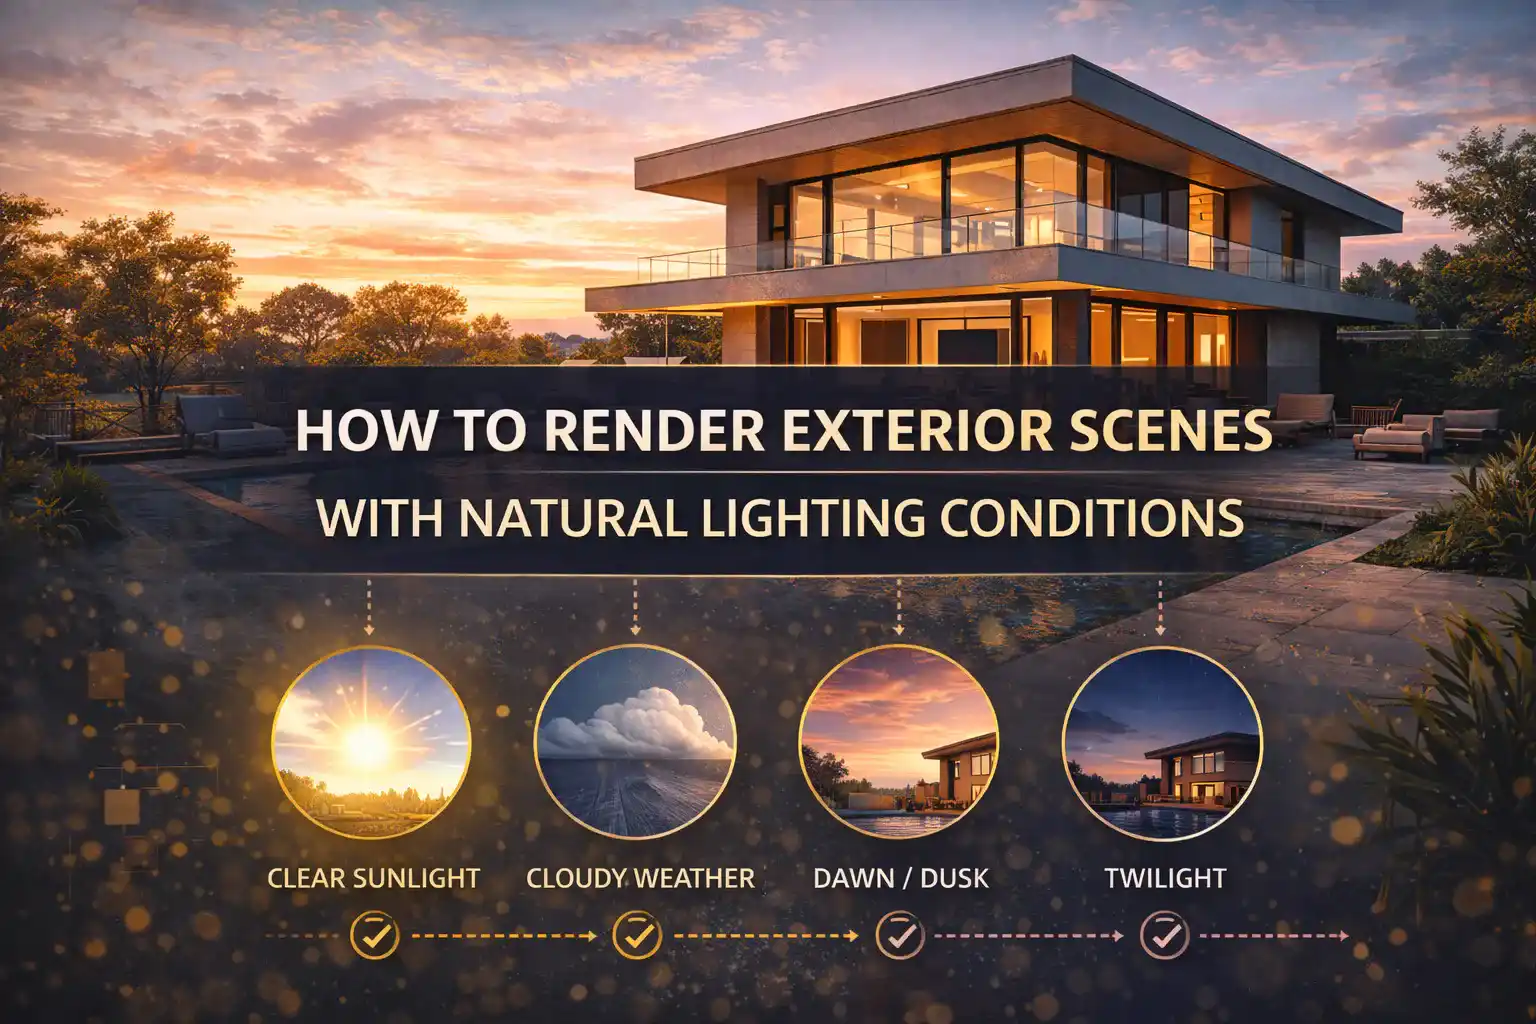
How to Render Exterior Scenes with Natural Lighting Conditions
Natural lighting exterior rendering is the soul of any architectural visualization. When it comes to exterior rendering, nothing separates a medium result from a realistic image. Understanding how to copy the behavior of natural light is an essential and non-negotiable skill. Without proper lighting, the exterior scenes can never be created in a realistic form. So, you need to properly work on this skill and create stunning exterior visuals.
If you are someone struggling with business sales issues. The only thing that can increase your sales is the way you design your buildings. They must look real even before a single brick is laid on the ground. For that, get the Best Exterior Rendering Services from a reliable company because they design every scene with perfect lighting conditions. The renders look ultra-realistic!
This guide is best for understanding how to Render Exterior Scenes with Natural Lighting Conditions!
Understanding Natural Light in the Context of Exterior Rendering
Before using the rendering software, you need to first understand what natural light actually consists of in an exterior space.
Natural light is never a single source. It is a complex combination of direct sunlight and reflected bounced light from surrounding surfaces.
A virtual sun is positioned to show the specific time of the day. To make it look real, a 360-degree photo (HDRI) is wrapped around the scene. This photo adds natural light and reflections from every side.
You need to consider the intensity and the direction of light to accurately copy the natural lighting conditions. Moreover, the way light bounces off the surfaces must also be replicated. Using natural light elements like sunlight and skylight adds realistic visual to the scenario
Steps to render exterior scenes with natural lighting conditions
Step 1: Choose the Right Time of Day
One of the influential decisions that you will make in exterior rendering is the selection of when your scene takes place. The time of the day shows the warmth and angle of every highlight in the image. Such as:
- Golden Hour is in the Early Morning or Late Afternoon. It creates gentle shadows and warmth that makes it perfect for residential scenes.
- Midday Light provides the crisp that is perfect for showcasing clarity. It is the best for commercial projects.
- Overcast Conditions produce a soft illumination that is best for showcasing material textures and building details without distraction.
Step 2: Set Up Your Sun and Sky System
Once the time of day is chosen, set up your sun and sky system properly. Modern rendering software offers physically-based sun and sky models that copy real atmospheric behavior.
- For outdoor scenes, use a sun and sky system as your main light source to copy daylight
- Add fill lights with lower intensity
- Always adjust the position to create dynamic shadows. It adds realism to the scene
- Position the sun at an angle between 30° and 60°
- Use geographic location to automatically calculate accurate sun angles for specific project locations.
Step 3: Use HDRI Maps for Environmental Realism
HDRI maps are one of the most powerful tools. You can achieve realistic exterior lighting through it. They capture a 360-degree photographic record of a real-world environment and use it to light your 3D scene.
- For outdoor scenes, pick HDR maps that reflect specific daylight conditions
- Choose HDRI files that match your weather conditions
- Layer your HDRI with a dedicated sun object to gain independent control over sun intensity and shadow softness.
Step 4: Master Shadow Quality and Behavior
Amateur renderings provide harsh shadows. In real life, the shadows are filled with bounced light from the sky.
The professional exterior rendering lighting techniques make sure that the shadow has a subtle blue tint. This adds an important layer of realism. Make sure to keep it soft and natural.
Key shadow settings to control:
- Increase the sun’s apparent radius to produce soft edges rather than sharp ones.
- Tint shadows slightly toward blue
- Avoid pitch-black shadows
Step 5: Apply Global Illumination
Natural light in architectural rendering is achieved by applying global Illumination. It calculates how light bounces from surface to surface.
In exterior scenes, this means:
- Sunlight bouncing off a white wall adds warm fill to adjacent surfaces.
- Light reflecting off green grass adds subtle color cast to nearby façades.
- Enabling “Limit Color Bleeding” prevents excessive color bounce from grass or red bricks. This avoids unnatural tints in nearby surfaces.
- Set GI bounces to at least 2–3 for exterior scenes to ensure realistic secondary light behavior without excessive render times.
However, the best thing is to get help from a professional. To achieve natural lighting conditions, you have to be skilled. By practicing more and more, you can achieve your desired realistic results.
Conclusion
To render exterior scenes with natural lighting conditions, you need to follow the steps mentioned in this guide. The best results come from studying how real light behaves. Plus, you need to understand the rendering software tools and carefully balance everything. A rendering should emphasize feelings. It also depends on the purpose of the building. When natural lighting is done right, the renders look ultra-real!


