How to Create High-Quality Kitchen and Bathroom Interior Renders
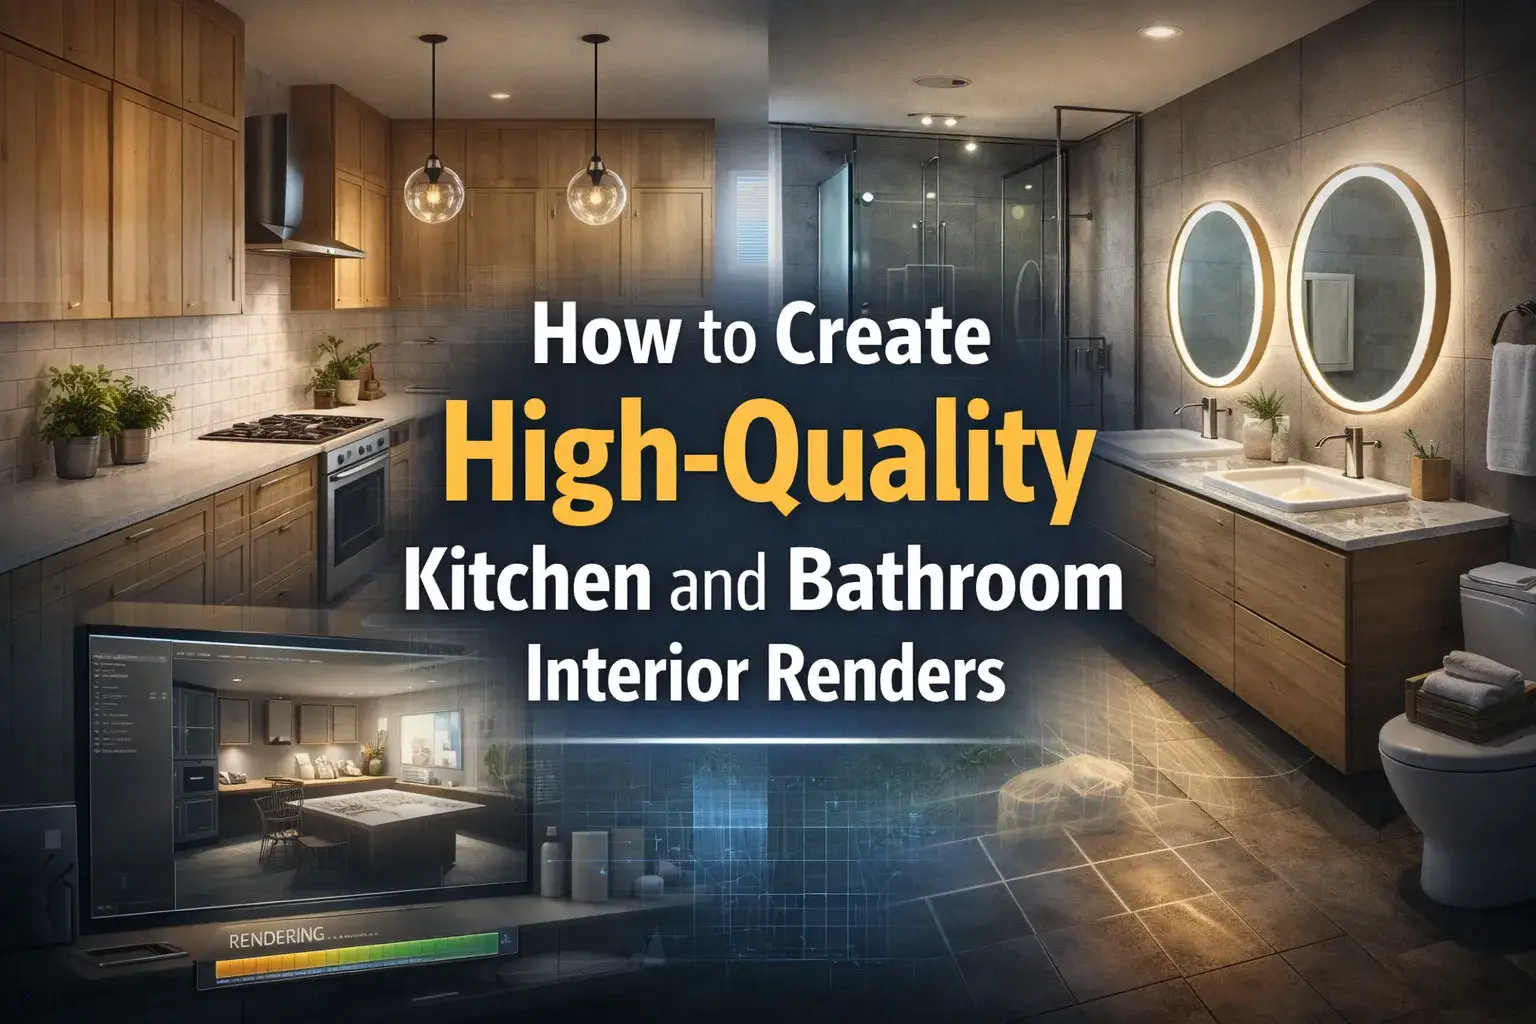
If you have the right skill to create high-quality kitchen and bathroom interior renders, you can easily stand out in the market. The ability to produce realistic renderings of kitchens and bathrooms has become one of the most powerful tools. You could be doing it to present for a renovation project or build a portfolio. Make sure that high-quality renders fill the gap between imagination and reality!
With multiple advanced rendering software and other tools, there has never been a better time to master this skill. In this competitive industry, the investors rely on experienced interior rendering services to update their spaces without wasting money. They make the perfect decisions by visualizing their concepts in three-dimensional images and animation.
Understand how to Create High-Quality Kitchen and Bathroom Interior Renders and avoid mistakes!
Why Kitchen and Bathroom Renders Matter
Before the time of 3D rendering, people had to communicate their designs through photos. This is a very time-consuming process that does not always result in satisfied clients.
But today, high-level render allows clients to see exactly what a finished space will look like. This prevents guesswork and costly last-minute changes.
Moreover, the decisions are made smartly. Properties are sold faster and clients are more satisfied. These are some of the major reasons. That makes the kitchen and bathroom render important.
Steps to create kitchen and bathroom interior renders
Step 1: Start With Accurate Technical Data
Every perfect render begins long before you use any rendering software.
This means that the process begins with the collection of project information that includes:
- technical drawings
- on-site measurements
- photos
- requirements
- CAD or BIM files
In this stage, you need to gather all the plans and dimensions. Import all the files and look into the references. Plus, you must be well known with the style, materials, etc. This way your planning will be more accurate.
Step 2: Build a Clean and Detailed 3D Model
The quality of your render depends on the model.
Inaccurate models result in unrealistic shadows. This is very important in kitchens and bathrooms because they have reflective surfaces everywhere.
Apply these best modelling methods:
- Use an accurate real-world scale for all furniture, etc
- Model cabinetry with proper edge bevels
- Include functional details like tap spouts, etc.
- Keep high-detail objects close to the camera
- Ensure proper UV mapping on all surfaces before applying textures
Step 3: Master Materials and Textures
This is the step where your render will either succeed or fail!
Kitchens and bathrooms consist of challenging surfaces. It includes polished stone, glossy ceramics, etc.
You need to be perfect with these to prevent unrealistic outputs.
Material tips for kitchen and bathroom renders are:
- Use PBR materials
- Source high-resolution textures
- Adjust roughness maps carefully for metal fixtures
- Use translucency and a slight frosting bump map for authenticity
- Layer diffuse color for wooden cabinets
- Always tile textures at the correct real-world scale
Step 4: Light the Scene Strategically
Lighting is one of the most critical steps to adjust. It is very challenging, which is why it requires careful planning.
For kitchens:
- Use a combination of natural light through windows and artificial under-cabinet
- Position the sun angle to cast warm directional light across countertops
- Add subtle HDRI environment lighting to fill shadows naturally
For bathrooms:
You can add small windows and make them darker than the kitchen.
One way is to position the lights outside of the scene and have them pointing into a window to achieve soft lighting.
For the spotlight, you can add colour to it! Plus, you can adjust luminance to create realistic illumination.
Lighting checklist
A professional architectural visualisation company never compromises on lighting because it affects the output.
So, make sure to layer your lighting and use warm-toned light. Most experts add a subtle glow to panels. Do not overbrighten it.
Step 5: Stage the Scene With Props and Styling
An empty render on even the most beautiful kitchen looks boring. You need to add staging that converts an empty space into a jaw-dropping scene.
To stage a kitchen, you can add:
- a bowl of fruit
- cutting board with bread
- a coffee machine
- open cookbooks
- herb pots
- Scatter small appliances on shelves
For bathroom staging you can add:
- Place folded towels
- a candle
- A soap dispenser
- a small indoor plant on surfaces
- Use plants
- natural light references
- Use a half-filled bathtub
Step 6: Set Up the Camera Correctly
Camera placement matters the most when you want to impress clients. It makes a big difference between a flat short and an amazing high-quality render. So,
- Use a focal length of 24–35mm for wide interior shots. This provides a natural feel
- Set the depth of field to focus on the hero element
- Use the rule of thirds to frame your composition
- Render from a standing human eye level
Step 7: Post-Production
Most professionals use Adobe Photoshop for final color correction.
Make sure to adjust final details to build up a mood.
You can also add glare effects to light sources. Output at a minimum of 3000px on the long edge for print; 1920px for digital presentations.
Such adjustments make the renders more realistic as compared to photographs. If you want to design your kitchen and bathrooms according to your imagination. You need to outsource the best architectural rendering services and fulfill your dreams.
Conclusion
In short, to create high-quality kitchen and bathroom interior renders, you need to be an exapert in technical knowledge with creativity. From accurate modeling to thoughtful lighting, make sure to be very careful with every step. The best thing is the availability of modern tools that help to create realistic visuals in less time. Invest time in each stage of the workflow. Stay updated on design trends!
